|
|
 Create a blank image
with 500X370 pixels in size (You may set any size
you like). Press D on
your keyboard and fill the background with black
(Alt+Delete). Create a blank image
with 500X370 pixels in size (You may set any size
you like). Press D on
your keyboard and fill the background with black
(Alt+Delete).
|
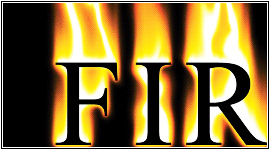
 Press X on the keyboard (to flip
colors) and then select the Text Tool, type
whatever you want, press OK. Press X on the keyboard (to flip
colors) and then select the Text Tool, type
whatever you want, press OK. |
 Duplicate your text 'Fire' layer, rename the copy to
'Fire Word' and hide it
for a while. Go back to layer 'Fire'. Duplicate your text 'Fire' layer, rename the copy to
'Fire Word' and hide it
for a while. Go back to layer 'Fire'. |
 Now press Ctrl+E to merge the text
layer into the background one. Now press Ctrl+E to merge the text
layer into the background one. |
|
|
 Duplicate the Background
layer, and go to Duplicate the Background
layer, and go to |
|
|
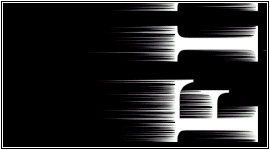
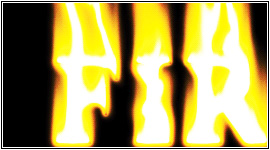
 From your menu use with
the settings "Wind" and "from the
left". From your menu use with
the settings "Wind" and "from the
left". |
 Press Ctrl+F to apply the same
filter over again. Press Ctrl+F to apply the same
filter over again. |
|
|
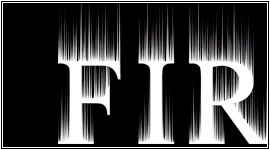
 Now use in order to straighten your work
up. Now use in order to straighten your work
up. |
|
|
 Apply with a value of 2. Apply with a value of 2. |
|
|
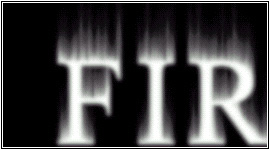
 Go to Check the Colorize option and use 50 for
Hue and 100 for Saturation Go to Check the Colorize option and use 50 for
Hue and 100 for Saturation |
|
|
 Duplicate the layer and
go to again. Check the Colorize option and use 0 for
Hue and 100 for Saturation Duplicate the layer and
go to again. Check the Colorize option and use 0 for
Hue and 100 for Saturation |
|
|
 Set the layer to Color Dodge. Now press Ctrl+E to merge it with the
layer behind. Name the new layer with 'Flame'. Set the layer to Color Dodge. Now press Ctrl+E to merge it with the
layer behind. Name the new layer with 'Flame'. |
 Apply with a value of 1. Apply with a value of 1. |
|
|
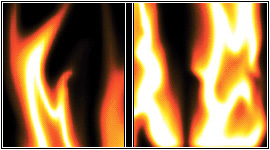
 Using the Smudge Tool Using the Smudge Tool
 with the settings
of:Brush Options (Diameter: 50, Hardness: 0) and
Pressure=80%. Now start dragging upward from the
shape edges. with the settings
of:Brush Options (Diameter: 50, Hardness: 0) and
Pressure=80%. Now start dragging upward from the
shape edges. |
|
|
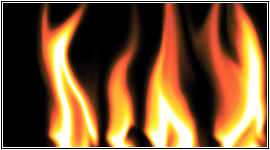
 After you shape the fire
flame using the brush size of 50, now change it to
a smaller one with the same settings above, but
brush size of 35, 30, 20 now. After you shape the fire
flame using the brush size of 50, now change it to
a smaller one with the same settings above, but
brush size of 35, 30, 20 now. |
|
|
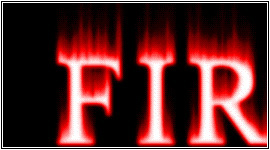
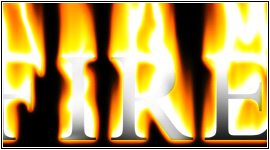
 In step
we have duplicated the text layer
'Fire', got 'Fire Word' layer and hid it,
remember? Now activate this layer and drag it to
the top of layers palette (Ctrl+Shift+]). Fill it with
Black. In step
we have duplicated the text layer
'Fire', got 'Fire Word' layer and hid it,
remember? Now activate this layer and drag it to
the top of layers palette (Ctrl+Shift+]). Fill it with
Black. |
|
|
 Dupliacte the layer
'Flame' and drag the copy
layer to the top of layers. Dupliacte the layer
'Flame' and drag the copy
layer to the top of layers. |
|
|
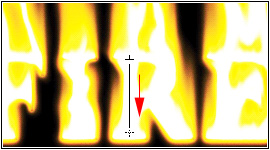
 Press on Add layer mask button Press on Add layer mask button
 . Now Press G on your keyboard for
gradient tool. Use the Linear Gradient Tool .
While the mask is still active, press D on your keyboard for
default colors, fill the layer dragging from the
top to the bottom, as shown below. . Now Press G on your keyboard for
gradient tool. Use the Linear Gradient Tool .
While the mask is still active, press D on your keyboard for
default colors, fill the layer dragging from the
top to the bottom, as shown below. |
|
|
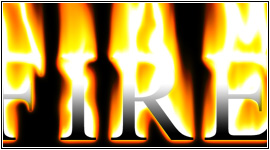
 Here is what you
get. Here is what you
get. |
|
|
 Using the paintbrush
tool Using the paintbrush
tool
 hide and unhide flame
areas. Paint over the mask of this
layer. hide and unhide flame
areas. Paint over the mask of this
layer. |
|
|
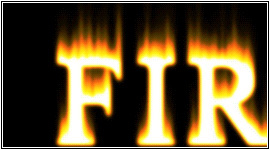
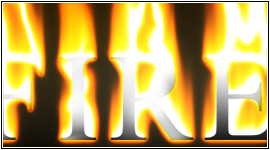
 To add the heat effect,
duplicate the 'Flame'
layer and apply with a value of 11
and drag it above the 'Fire
Word' layer. To add the heat effect,
duplicate the 'Flame'
layer and apply with a value of 11
and drag it above the 'Fire
Word' layer. |
|
|
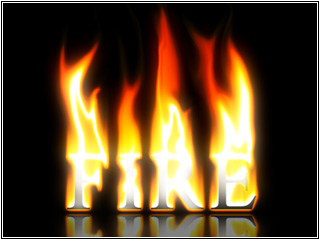
 Add a reflection to the
artwork. Add a reflection to the
artwork. |
|
|